

How to Apply
Follow these steps to register, complete your applicant profile, verify your identity with DigiLocker, fill in and submit a scholarship application, and track its status from your dashboard.
Create your account
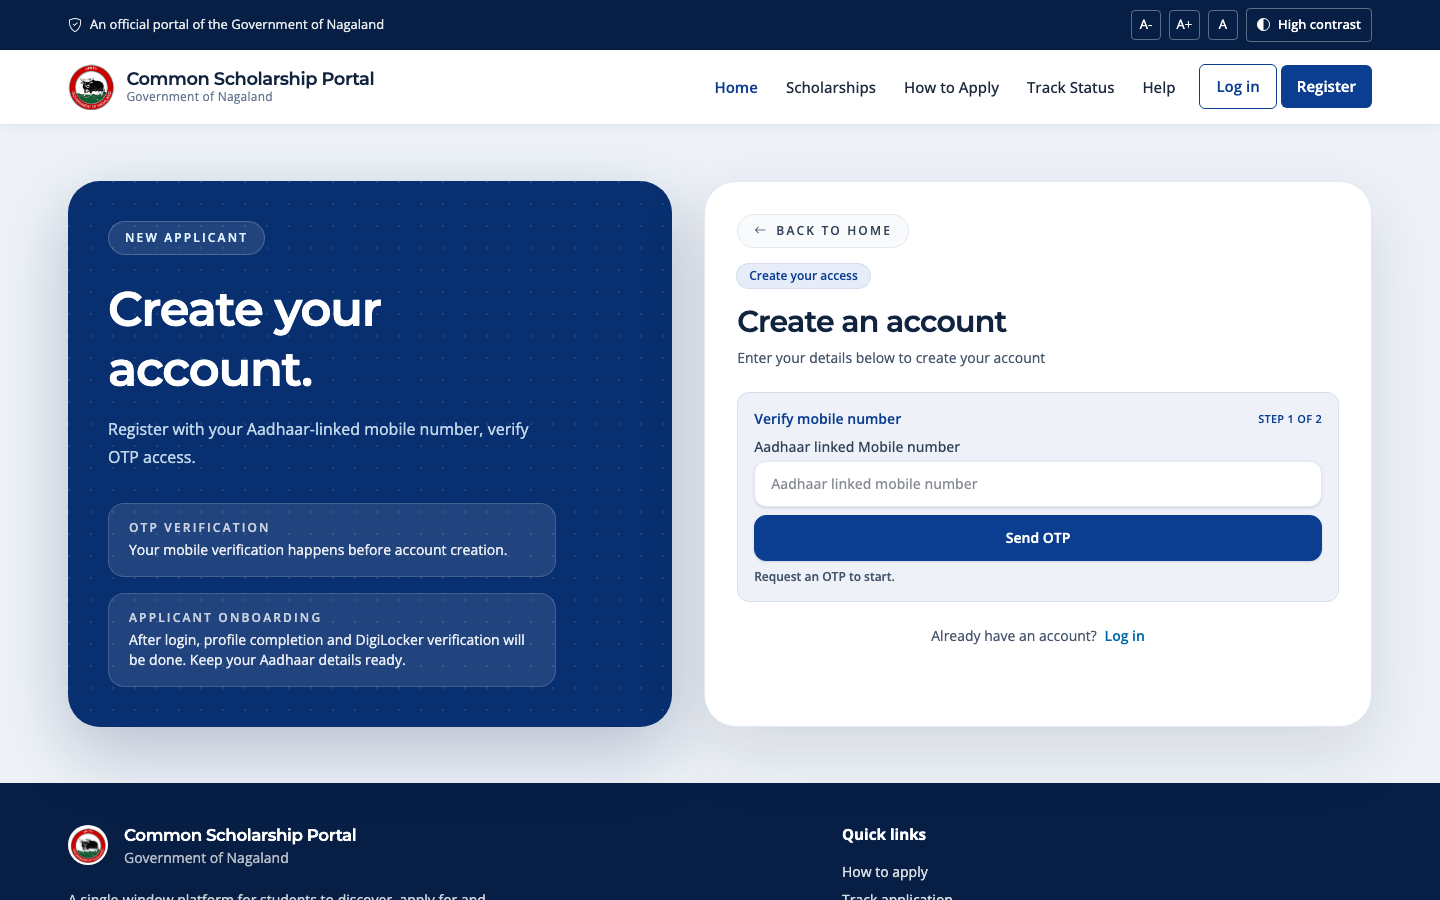
Click Register on the top menu and sign up using your Aadhaar-linked mobile number. Your mobile number is verified with an OTP before your account is created — no email verification link to wait for.
- Keep your Aadhaar-linked mobile number handy to receive the OTP.
- Once verified, set a password to secure your applicant account.
- After logging in, you'll be guided through profile completion and DigiLocker verification automatically.
Complete your applicant profile
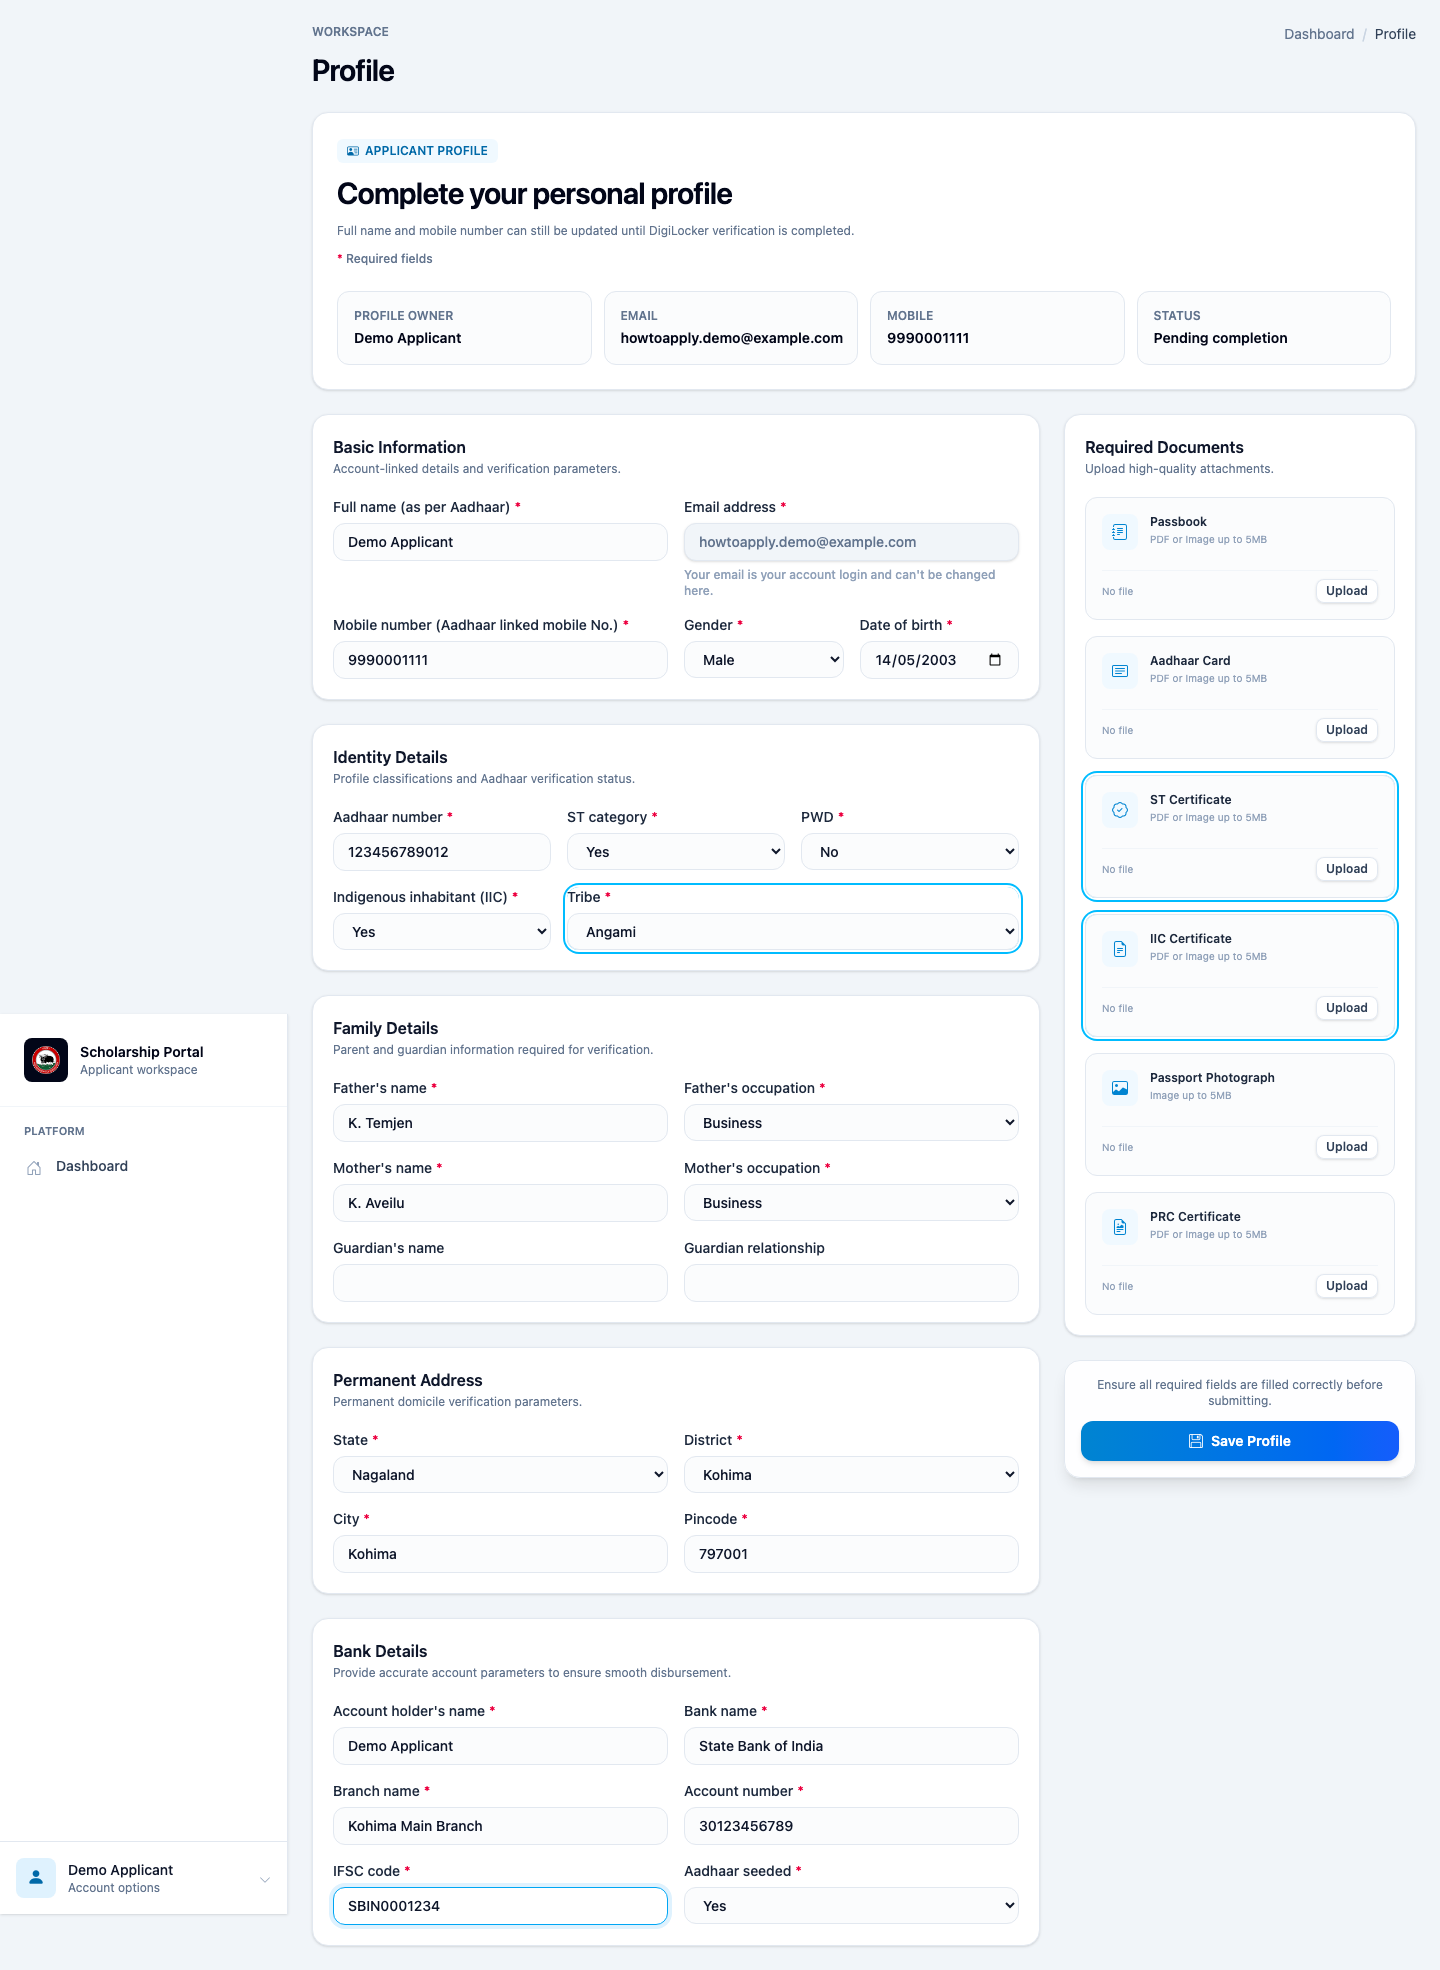
After your first login, you'll land on the Profile page. Fill in your basic information, identity details, family details, permanent address and bank details, then upload the required documents.
- Enter your name and date of birth exactly as they appear on your Aadhaar card — these are matched against DigiLocker in the next step.
- Upload your passbook, Aadhaar card, photograph and any category-specific certificates (ST, IIC, PRC, disability) that apply to you.
- Click Save Profile once every required field is filled in.
Verify your identity with DigiLocker
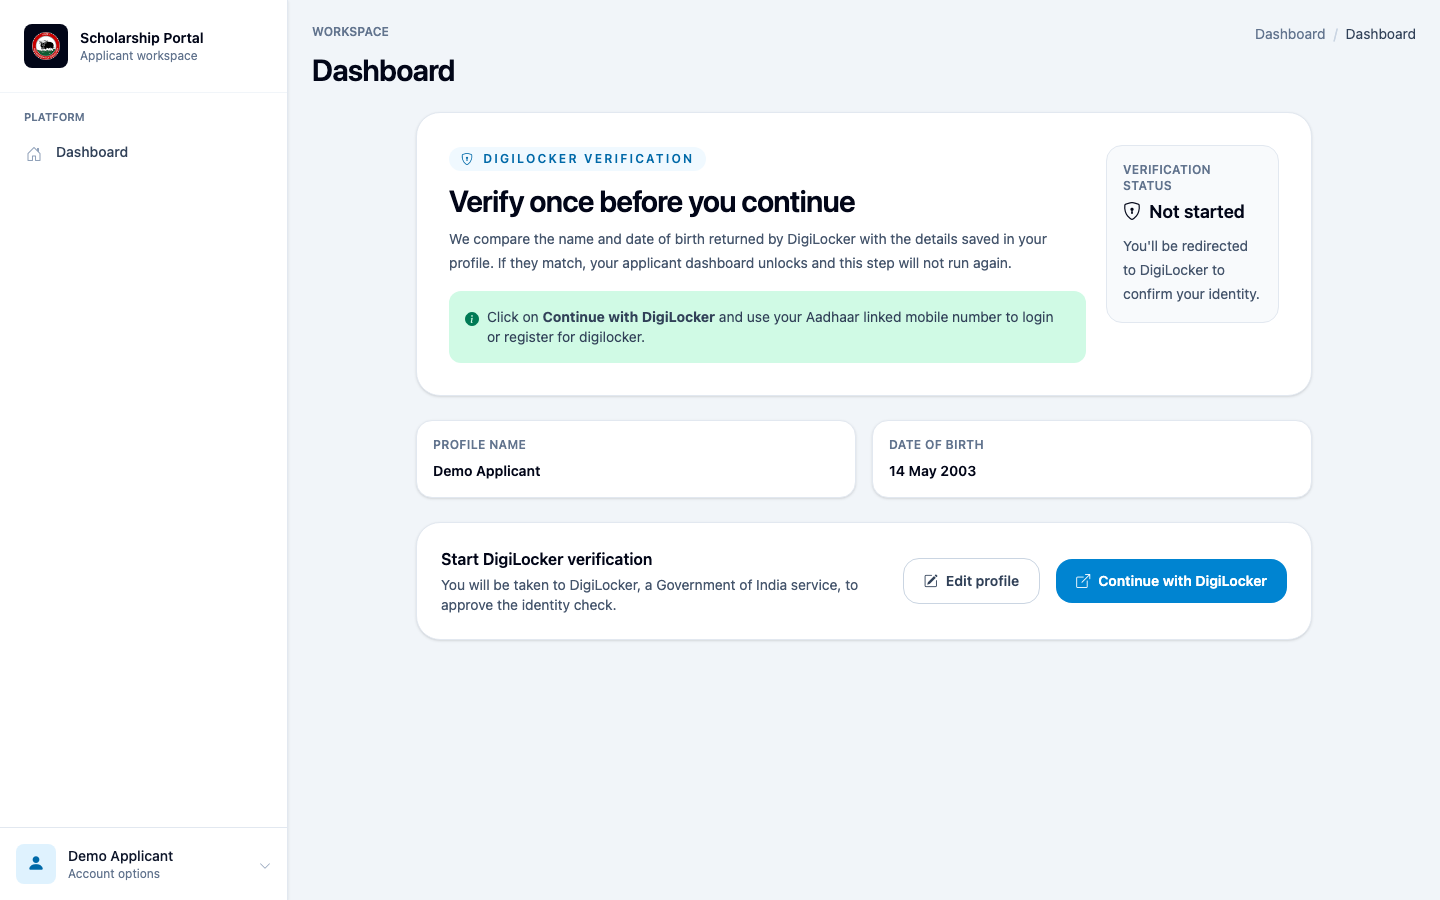
Once your profile is saved, you'll be taken to the DigiLocker verification screen. This one-time check confirms your name and date of birth against your DigiLocker records before unlocking the rest of the applicant dashboard.
- Click Continue with DigiLocker and log in or register on DigiLocker using your Aadhaar-linked mobile number.
- Approve the identity check — you'll be redirected back to the portal automatically.
- If your name or date of birth don't match your profile exactly, correct your profile and try again — this step only needs to be completed once.
Select your scheme, course and institution
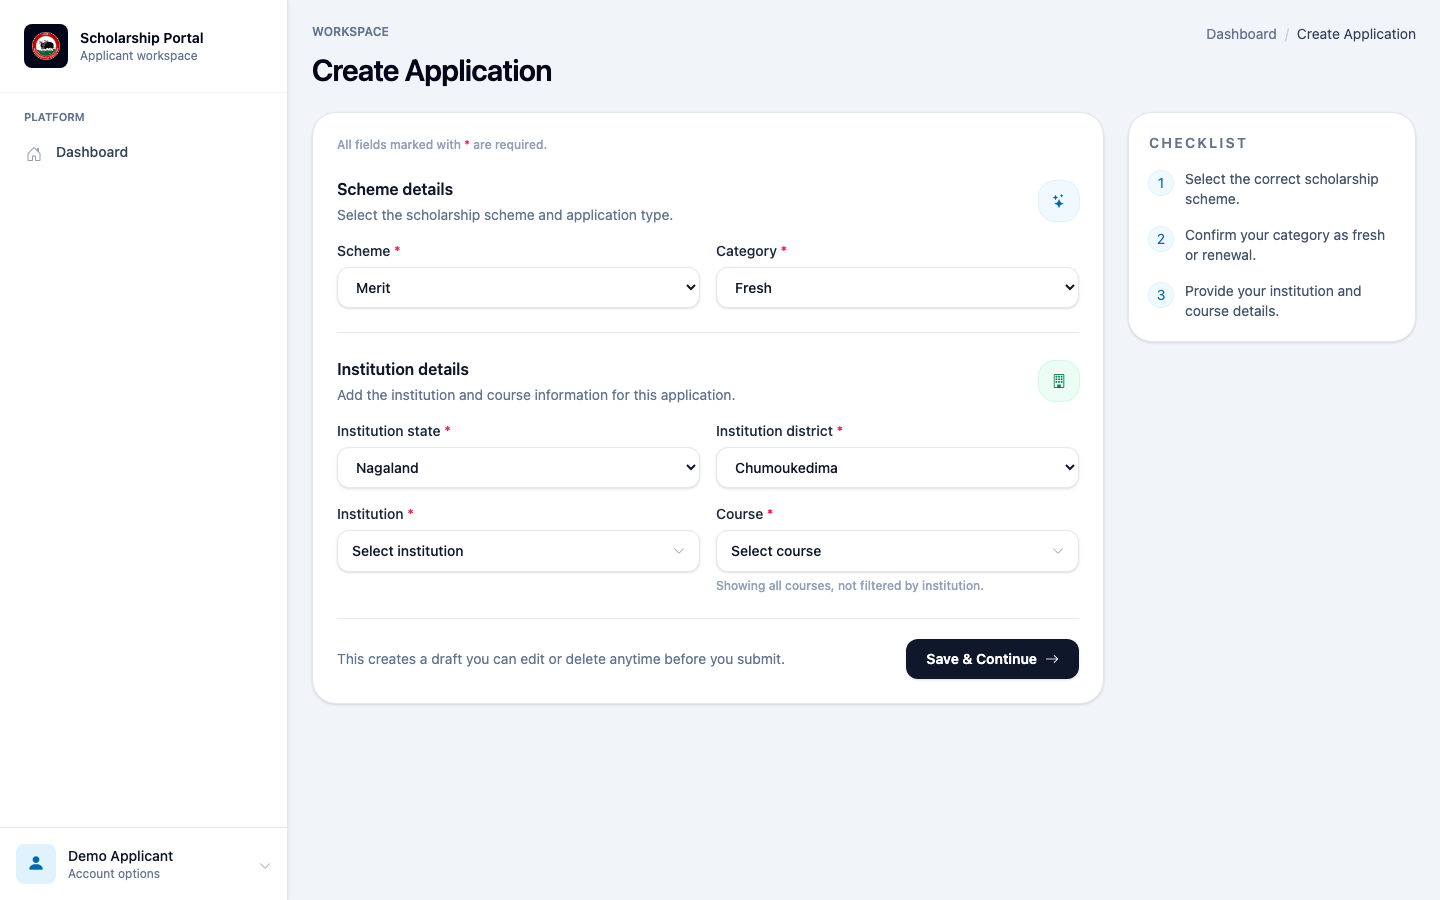
From your dashboard, click Create Application to start a new scholarship application. Choose the scholarship scheme and category, then add your institution and course details.
- Select the correct scholarship scheme and your category (Fresh or Renewal).
- Pick your institution's state and district to narrow down the institution list.
- Choose your institution and course, then click Save & Continue to create your application draft.
Fill in the scholarship application
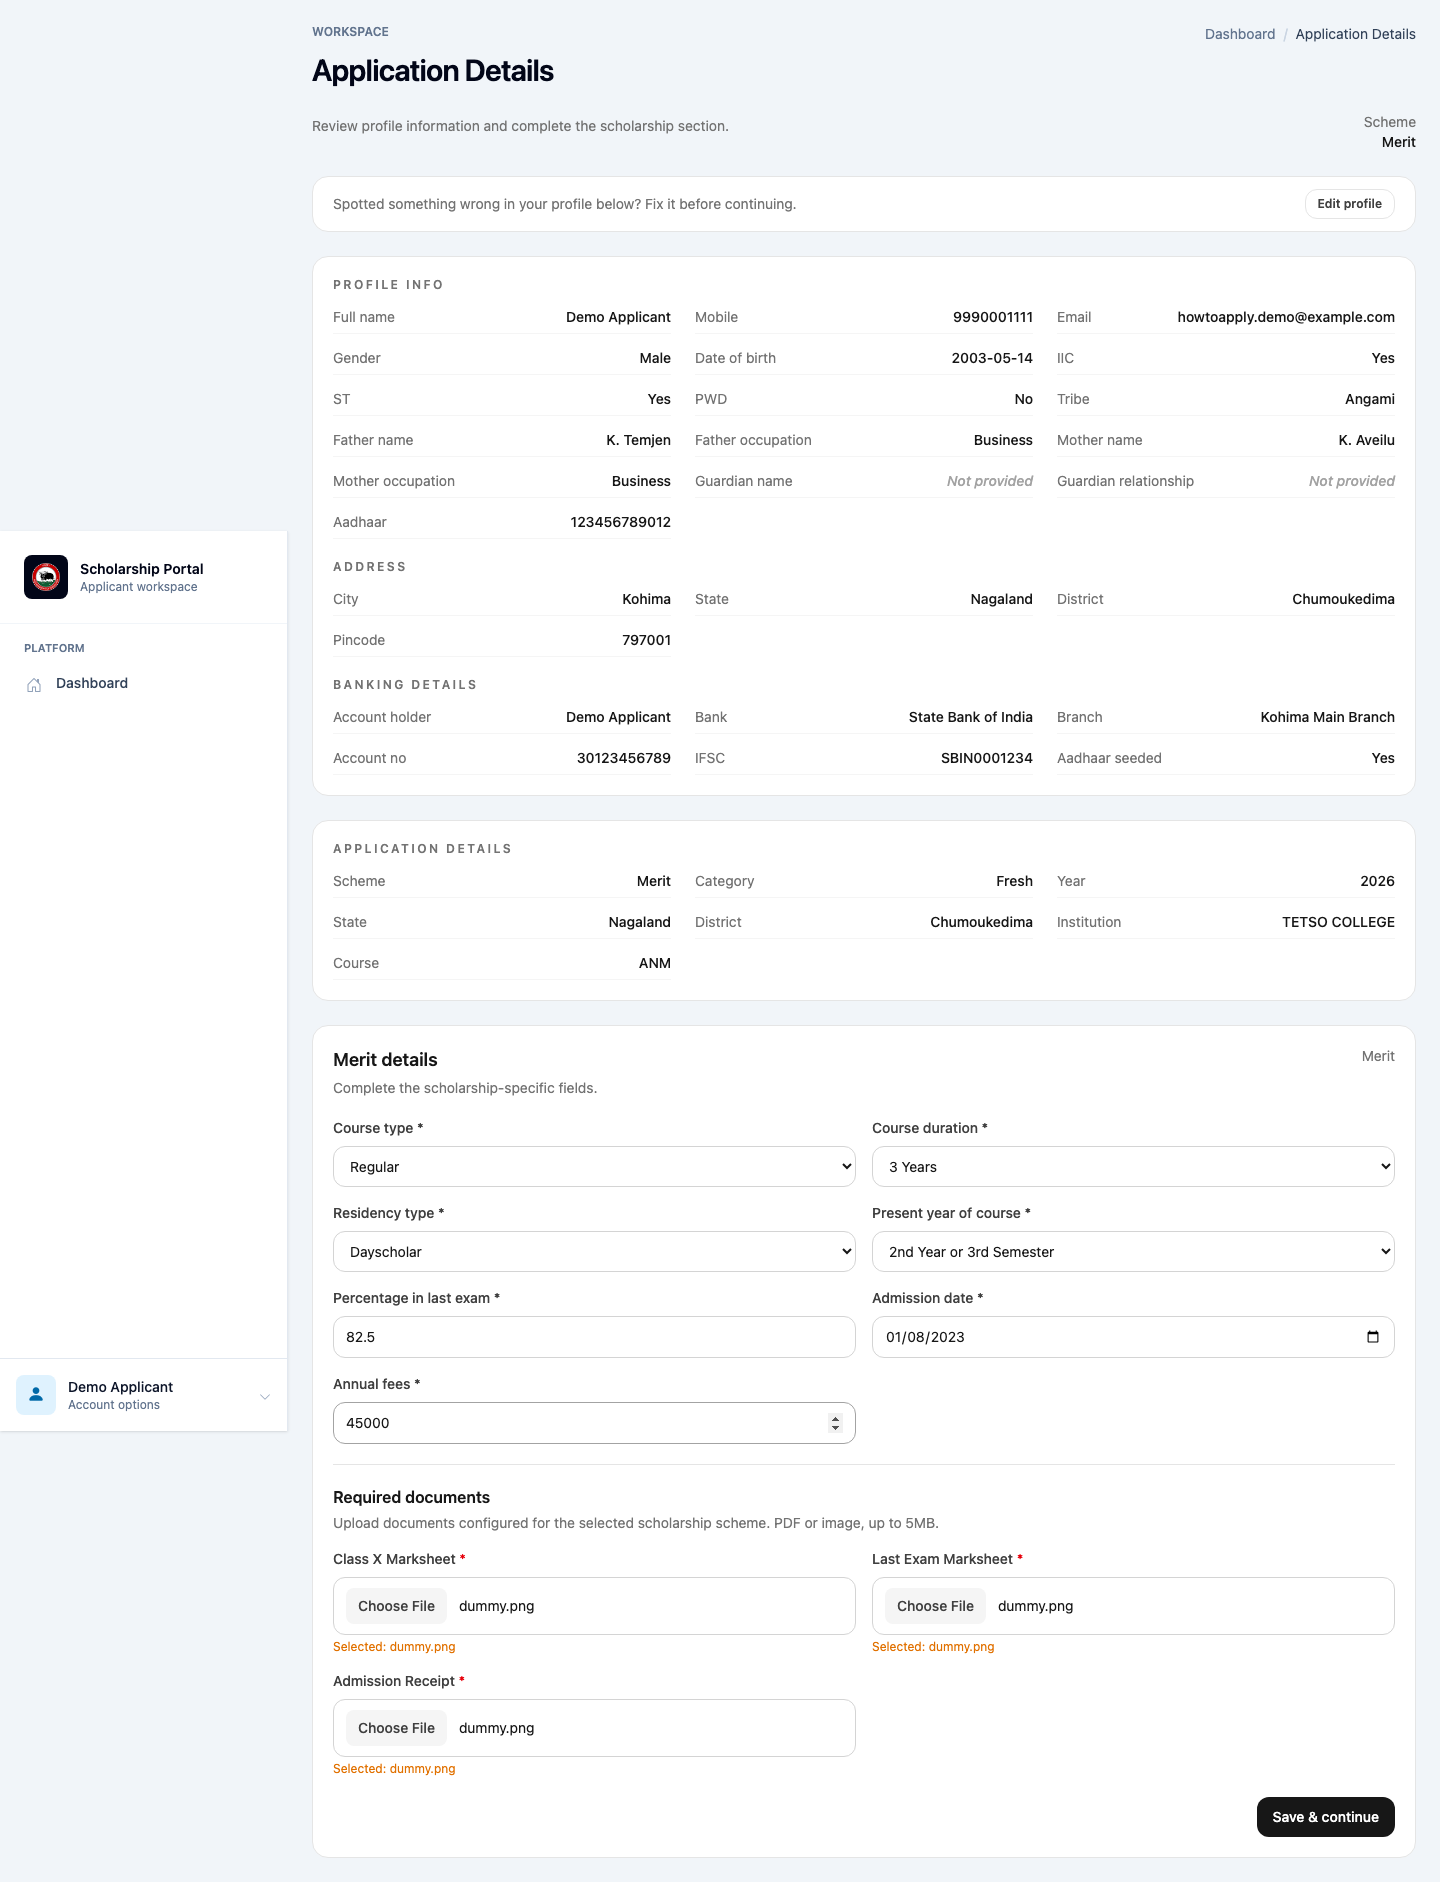
After creating the draft, you'll land on the Application Details page. It shows your profile and application summary at the top, followed by scheme-specific fields — for example, a Merit scholarship asks for your course type, duration, residency, admission date and annual fees.
- Fill in every scholarship-specific field marked required for your scheme.
- Upload the required documents for the scheme, such as marksheets and admission receipts, under Required documents.
- Click Save & continue once all fields and documents are in place.
Preview your application
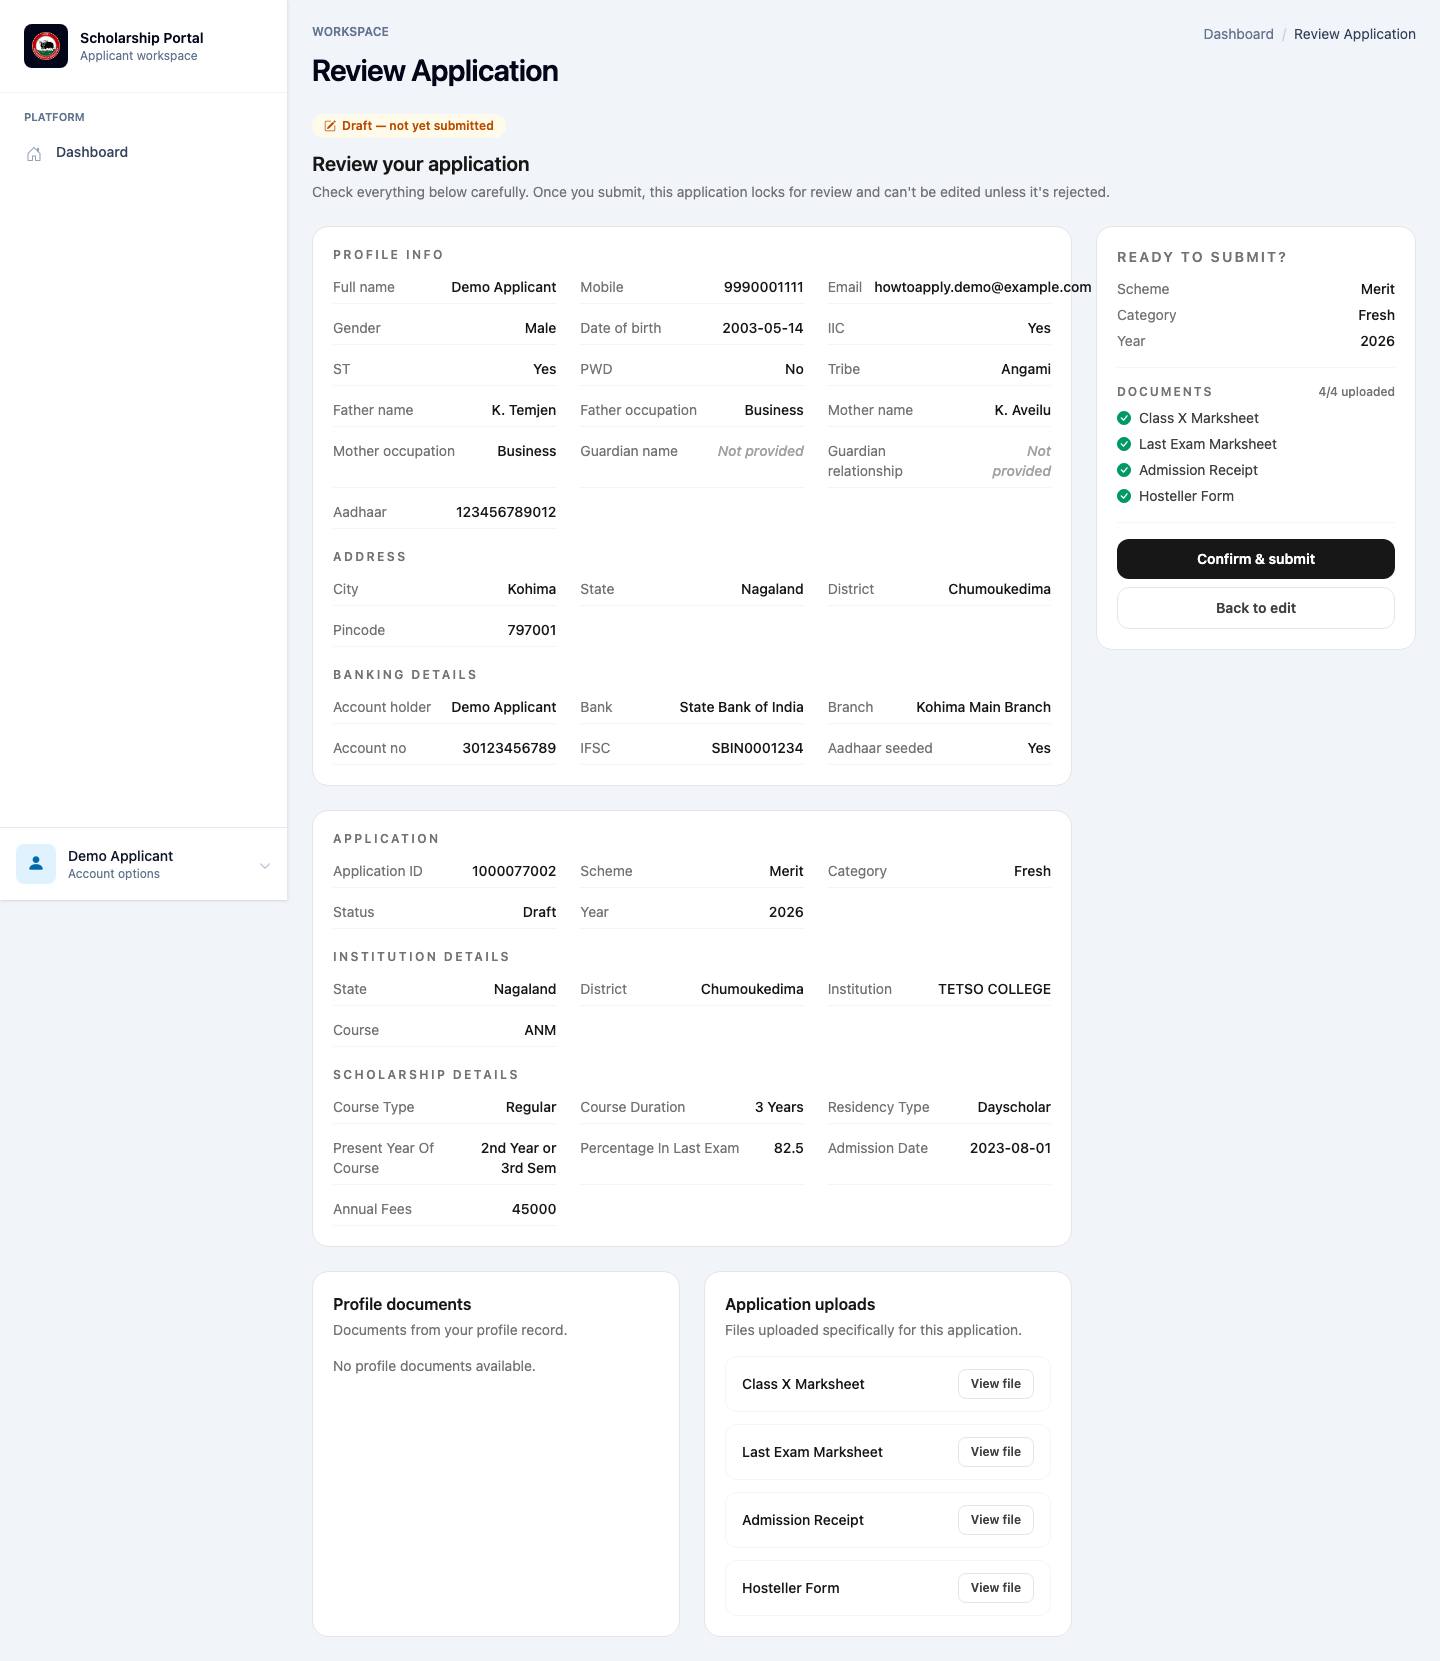
You're taken to a full preview of everything you've entered — profile details, application details and a document checklist — so you can double-check it before it locks for review.
- Check your profile and application details carefully for any mistakes.
- Confirm every required document shows as uploaded in the checklist.
- Use Back to edit to fix anything, or Confirm & submit once everything looks right — submitted applications can't be edited unless rejected.
Get your submission confirmation
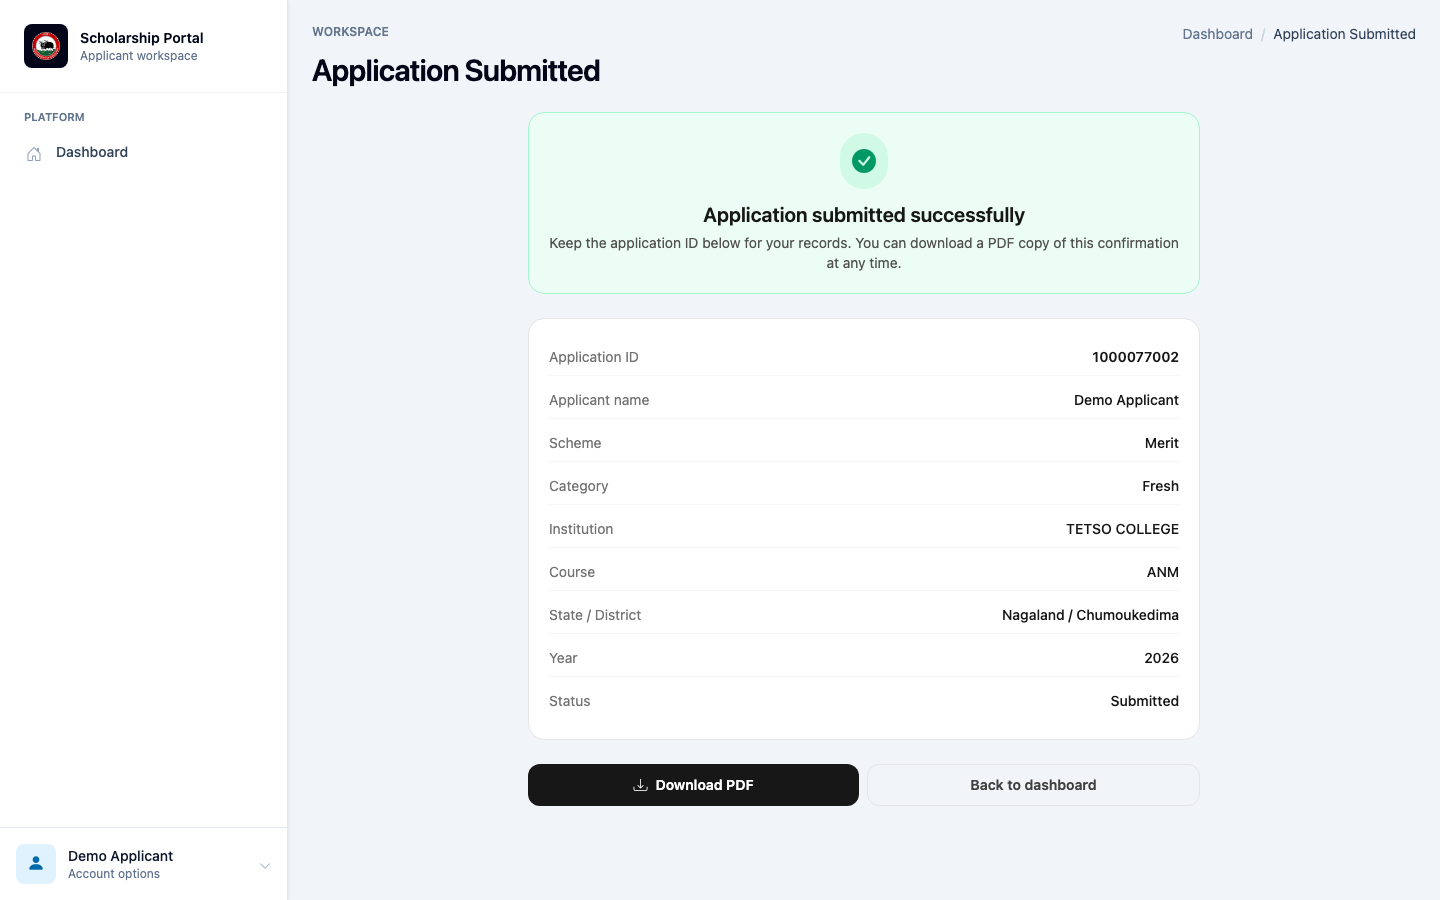
Once you confirm, your application is locked for review and you'll see an Application Submitted confirmation with your application ID and a summary of what you submitted.
- Note down your Application ID for future reference.
- Click Download PDF to save a copy of the confirmation for your records.
- Click Back to dashboard to return to your applicant workspace.
Track your application from the dashboard
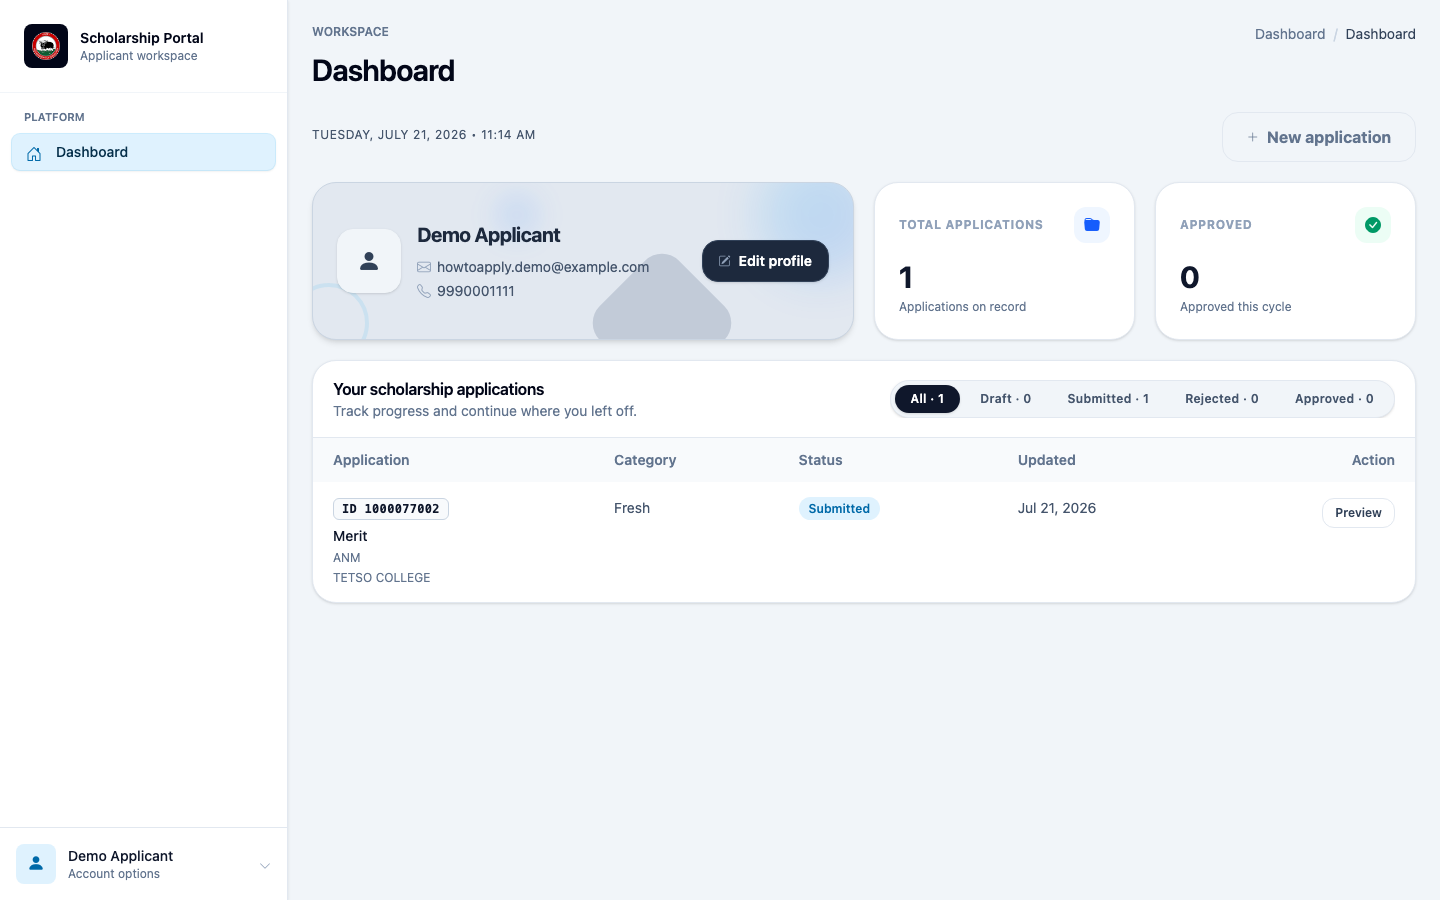
Back on your dashboard, your scholarship application now appears under Your scholarship applications with a Submitted status badge.
- Use the status tabs (Draft, Submitted, Rejected, Approved) to filter your applications.
- Click Preview on any submitted application to view it again at any time.
- The status updates automatically as officials process your application — from Submitted to Under Process, Verified, and finally Approved.
Ready to get started?
Create your account and begin your scholarship application today.